Start of another week. Hope everyone had a great week-end. I spent all day Saturday making cards. I was celebrating World Card Making Day and playing some on-line challenges. For all you gals who subscribe to my blog feeds I didn't send all of the entries out, but just posted them so you may want to check back through Saturday entries to make sure you didn't miss anything! I've still got a couple more to share too.
I built a snowman....isn't he cute. It's pretty much the only type of snowman I'm going to build down here but I'm okay with that. My temperatures have dropped off considerably from where they were a month ago. It's still nice but not hot, hot.
I made my snowman from Basic Grey paper - Jovial. I know I've been using Basic Grey a lot but I have a lot. There's a few really neat things on this guy. See his nose....I stamped one of the snowman stamps from Just Rite Stamps and cut it out. That was just too easy. His eyes, mouth and buttons....I'm so smart...somethimes. Didn't have any black bling so I used some of my pearls and my black Copic marker and altered the color. Now it does take a while for those to dry completely. Almost 24 hours.
The pom pom on his hat was two circles cut out and puffy paint applied and then heated to give it dimension and texture.
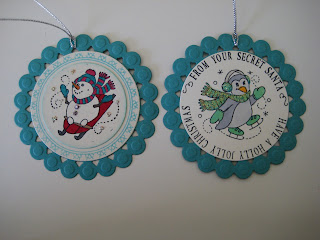
Inside the big box I made some Christmas Tags to fit. The back side is stamped To & From:
Scroll down and I'll give you the dimensions.
Large Box - 7 1/2 x 7 1/2 - scored at 2 1/4" all four sides.
Lid - 4 x 4 - scored at 1/2" all four sides.
Middle Box - 5 3/4 x 5 3/4 - scored at 1 3/4" all four sides.
Lid - 3 1/4 x 3 1/4 - scored at 1/2" all four sides.
Small Box - 4 1/2 x 4 1/2 - scored at 1 1/2" all four sides.
Lid - 2 1/2 x 2 1/2 - scored at 1/2" all four sides.
For the HAT:
This gets a little tricky so try it on scrap paper first. Score the 1 1/2" side at 1/4". ONLY SCORE ONE SIDE. On the opposite side that is 1 1/2" find the center point which is 3/4" and make a tick mark. (First square in picture.)
You will now need to score between the tick mark and the 1 3/4" score line.( second image). You're forming a triangle.
You're creating tabs so you can glue them all together so you need to cut away some of the cardstock and also angle the corners for a better fit (third image).
Fold on all three sides.
Assembly - Using a good sticky tape adhere all the 1 3/4" sides together. The other piece you see there is from a photo corner punch and help to form the tassle on the hat. So before you glue the remaining side together be sure to insert the photo corner. Once you have the triangle formed glue the bottom pieces and attach to the lid of the smallest box.
This was not my design ...I got the directions here. I re-wrote the directions as a couple of the measurements seemed to be off. Check over there to see how the boxes are folded.
I think I may try the Santa too.
Hope you enjoy!
Yvonne


4 comments:
Marlene said: the boxes are a diff. angle on this hobby eh? Looks sharp, if I ever get the time to try one I cerainly will.
Really cute Yvonne, I love snowmen....just might have to give this a try...
Sherry K
Very very cute. TFS
This is so sweet! Love it! I might have to try making this cute little guy! Thanks for sharing! :)
Hugs,
Julie
Post a Comment